HubSpot Integration with GamifyRoute
HubSpot is a CRM software. Use Gamify Route to collect customer information and automatically add it to the HubSpot Contact list.
Integrate your HubSpot account easily with Gamify Route by following the steps mentioned below –
Steps to Integrate HubSpot with Gamify Route
- Campaign > Integration > Hubspot Integration > Click on “Connect”
- Create a HubSpot account
- Get your HubSpot Access Token
- Use the HubSpot Access Token with the HubSpot module
- Setup the integrations feed & Map the input fields with opt-in form and claim form
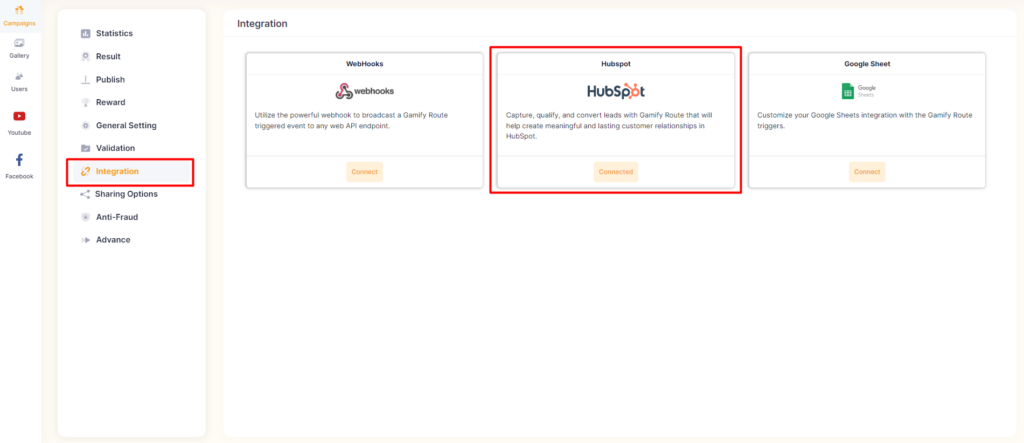
Go to the Campaign Detail from Gamify Route and Click on the integrations and click hubspot connect button as shown in the screenshot below-
- You will be asked for the HubSpot Access Token here.

- If you don’t have a HubSpot account, you can sign up here.
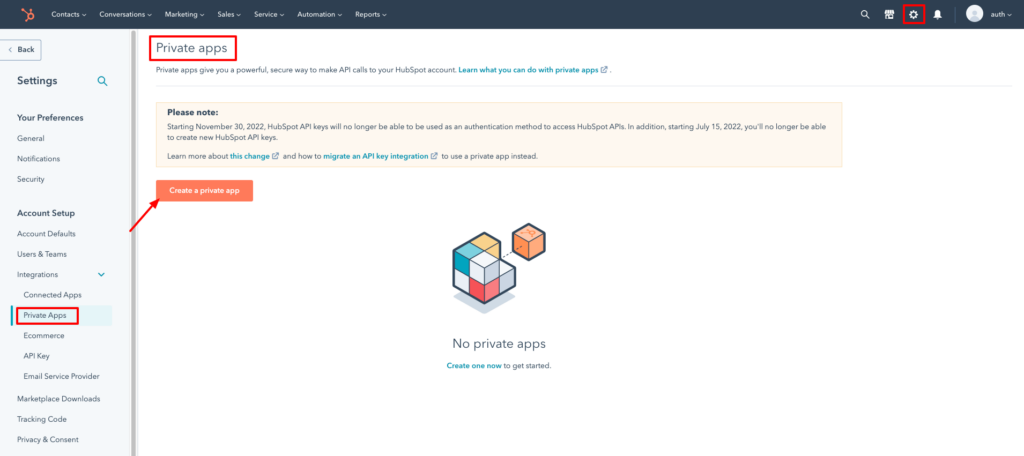
- Now, Go to your HubSpot account and click on the settings icon in the upper right corner, then click on Private Apps from the left sidebar → Create a private app.
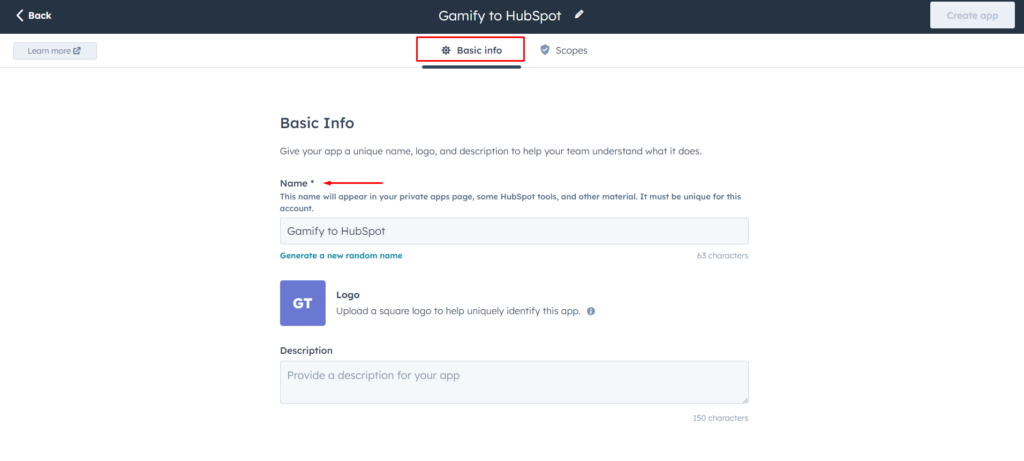
- After selecting Create a Private App, you will be taken to a page with the options Basic info and Scopes.
- You can enter any Name you wish in the Basic info. The Name will appear in your private apps.
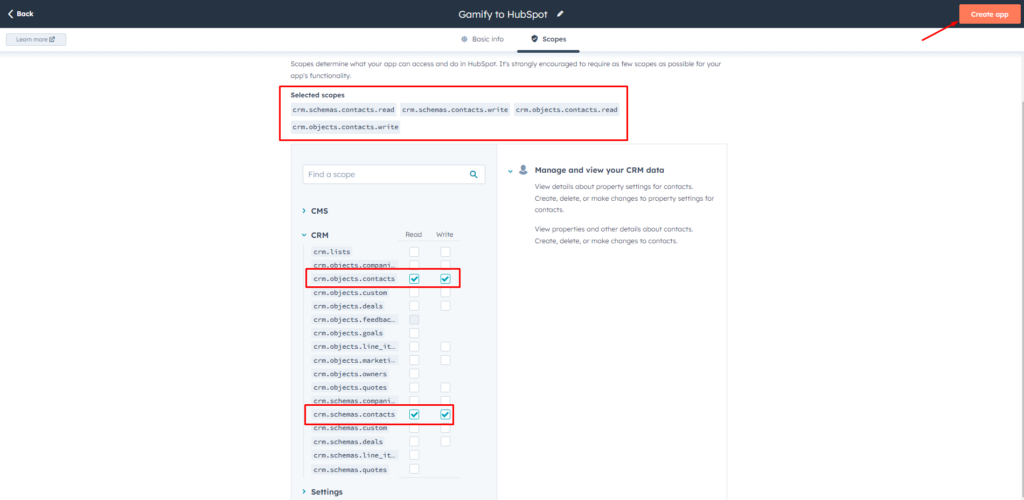
- Then navigate to the Scopes tab, find a scope (CRM), and select the crm.objects.contacts.read, crm.objects.contacts.write, crm.schemas.contacts.read, and crm.schemas.contacts.write checkbox, and then select Create app.
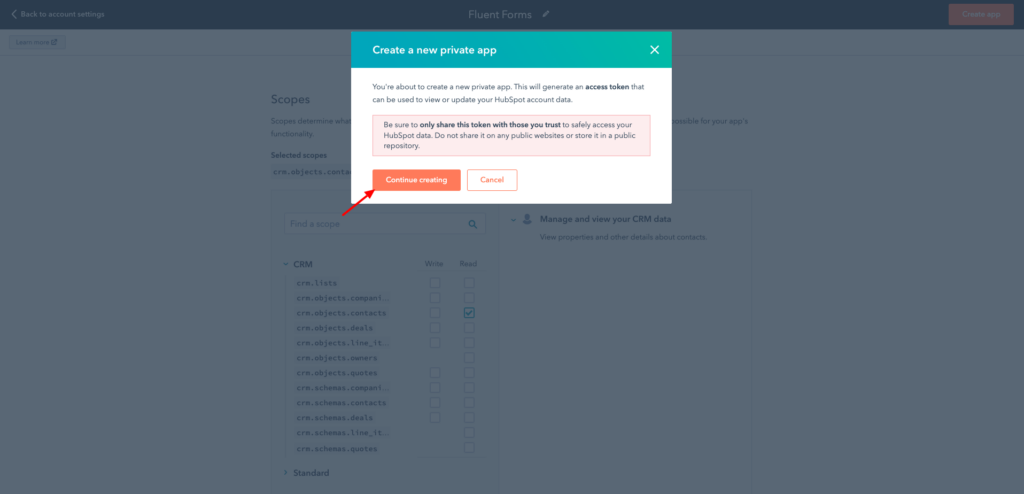
- A popup will appear and now click on the Continue Reading button.
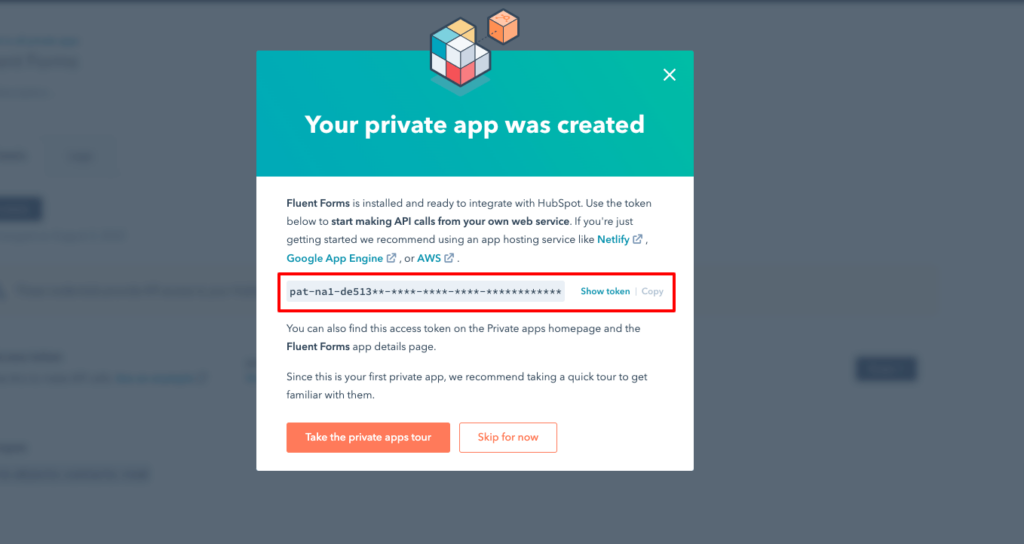
- Now, a window is showing where you will get the Token key.
- Copy the Access Token to use this in the next step.
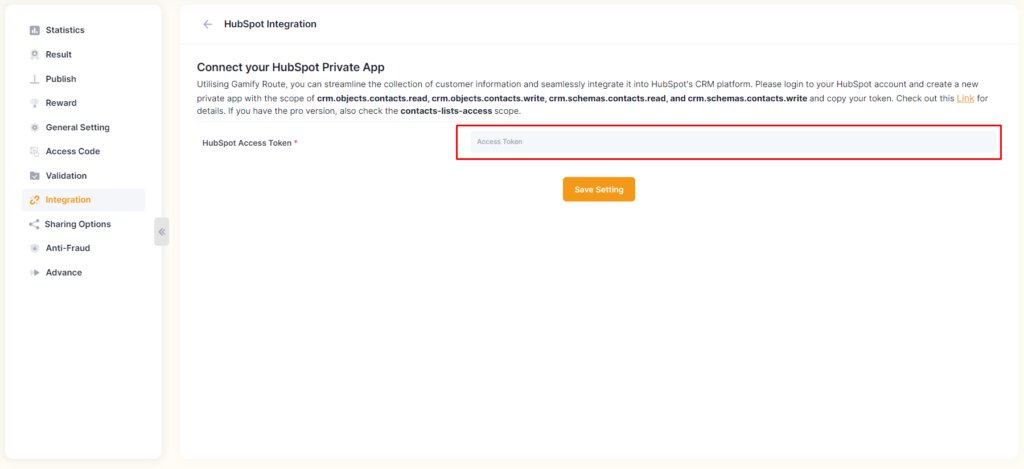
- Paste your HubSpot Access Token to HubSpot’s Global Settings tab.
- Click on Save Settings, and you will see a success notice that the Hubspot Access Token has been verified successfully.
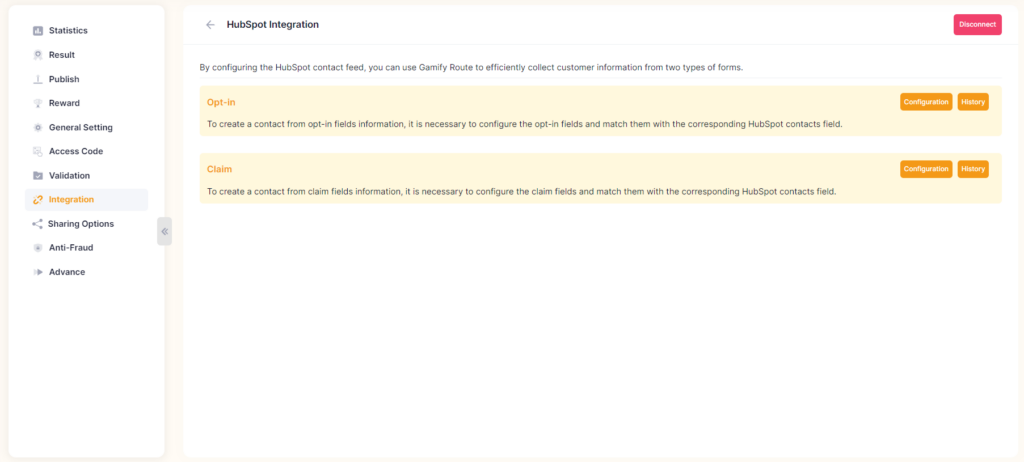
- After setting up the Access Token,you will see the Hubspot Integration Page as shown in the screenshot below-
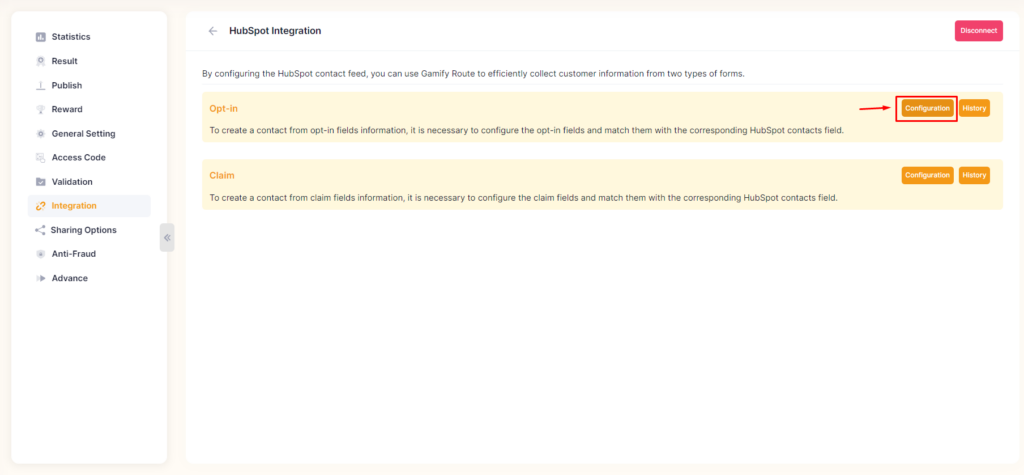
Now go to the particular form’s settings for the entries you want to be listed in HubSpot Integration.
- Opt-in Configuration: Click Configuration button as shown in the screenshot below-
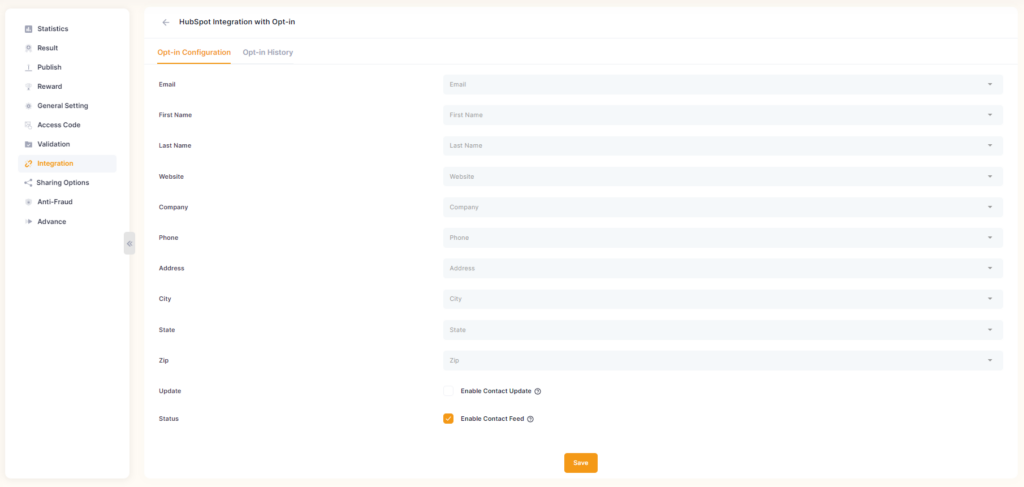
- Now you will see Hubspot integration with opt-in Page
- Configure Field Mapping & correlate the Hubspot Fields with the Opt-in form’s input fields (e.g, Email Address with Email, First Name with First Name etc).
- Enable Contact Update: The existing record is updated based on the email.
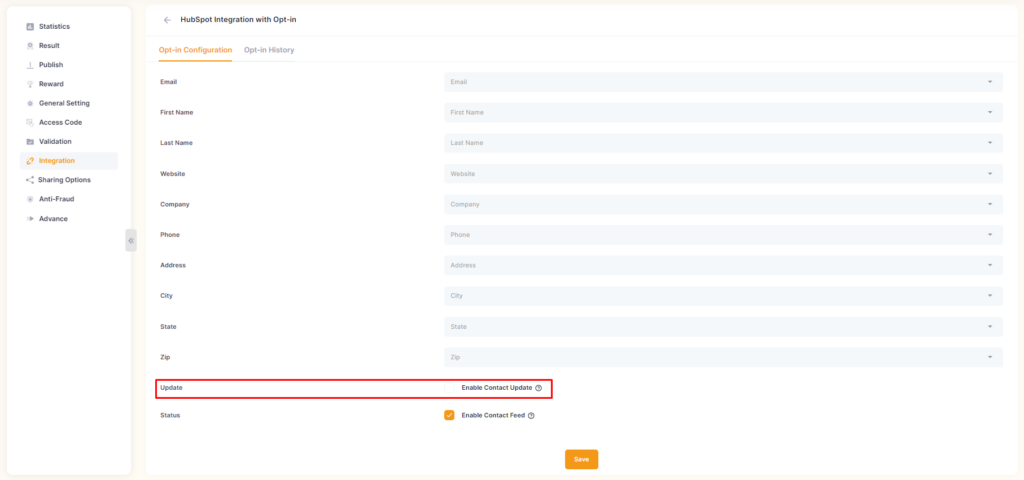
- Click on Save Button when the configuration is done.
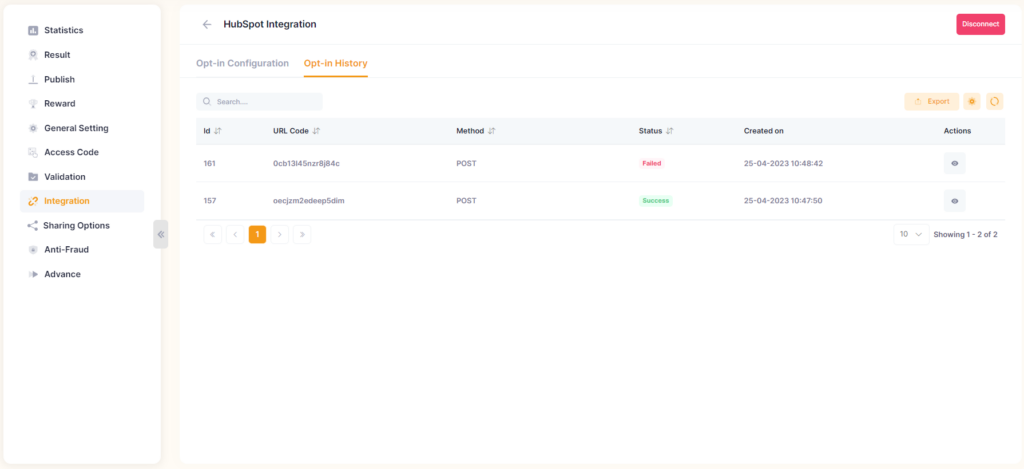
- Now, Click Opt-in History Tab and see Opt-in form feed history as shown in the screenshot below-
2.Claim Configuration: Click Configuration button as shown in the screenshot below-
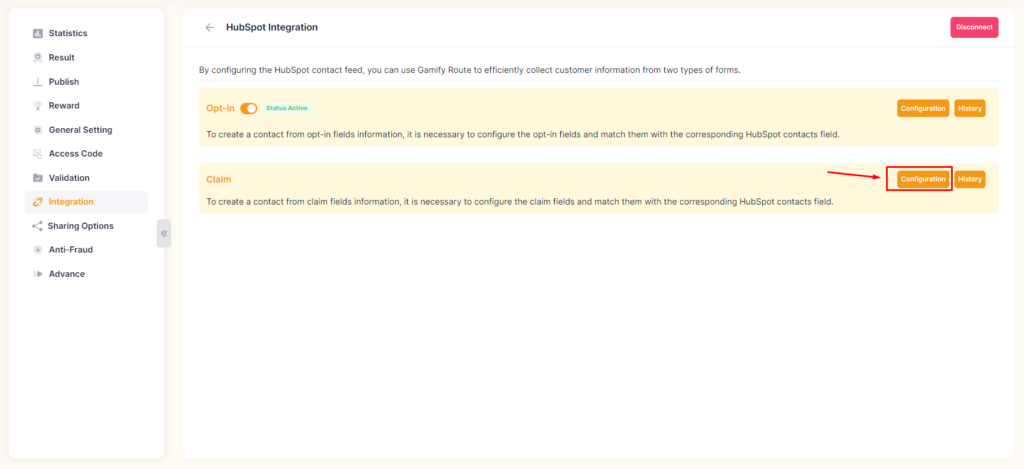
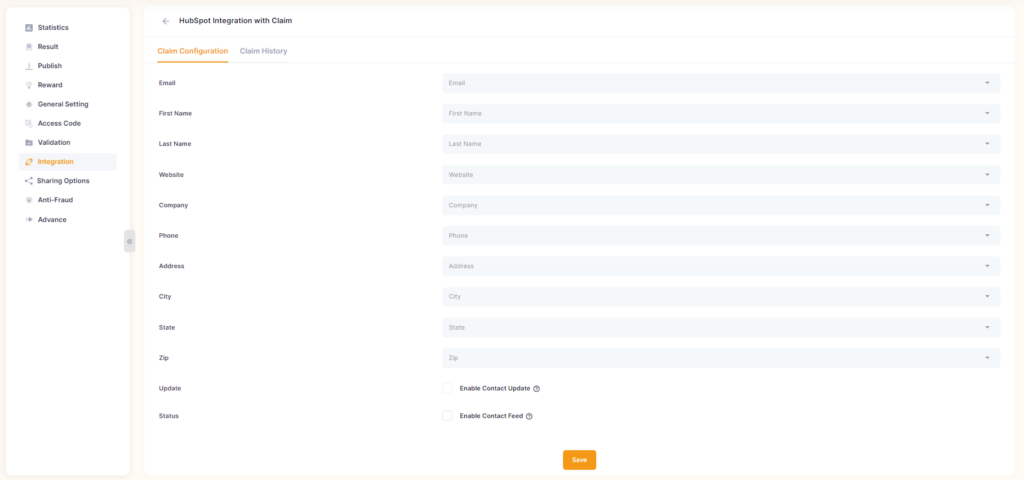
- Now you will see Hubspot integration with Claim Page
- Configure Field Mapping & correlate the Hubspot Fields with the Claim form’s input fields (e.g, Email Address with Email, First Name with First Name etc).
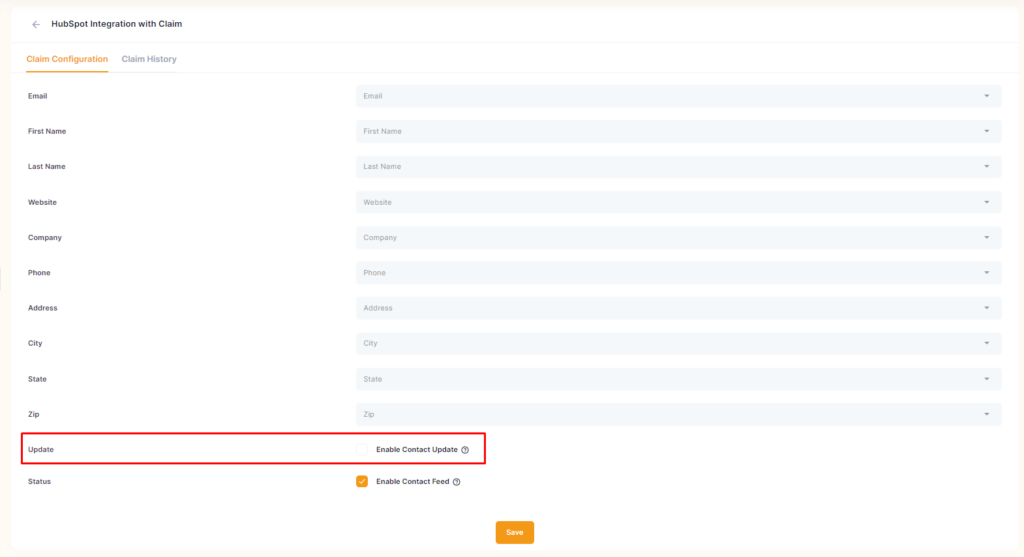
- Enable Contact Update: The existing record is updated based on the email.
- Click on Save Button when the configuration is done.
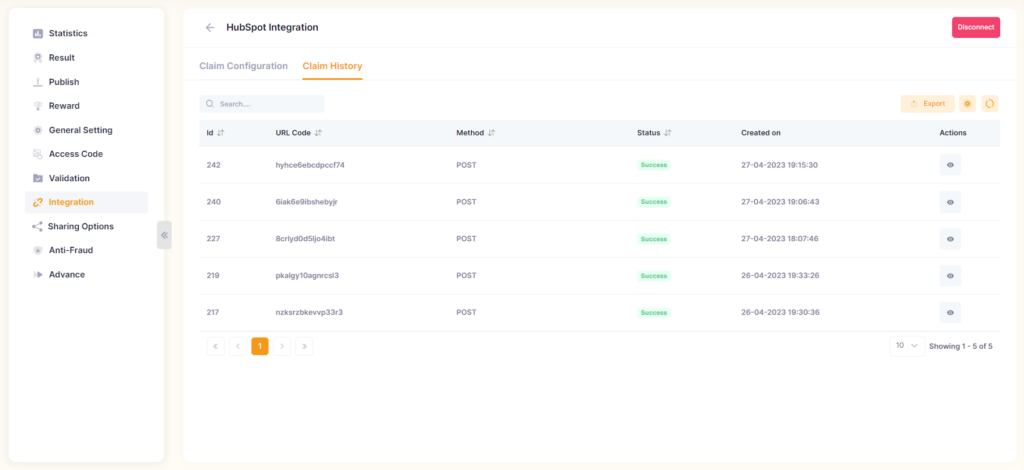
- Now, Click Claim History Tab and see Claim form feed history as shown in the screenshot below-